A Beginners Guide to Google Docs
- Apr 26, 2021
- 15 min read
Table of Contents
Introduction

Google Docs is a great apparatus that allows you to edit documents online from any computer, smartphone, or device as long as you have a Google Account. This is an exceptional tool for on-the-go, easy sharing capabilities, and a place for real-time collaborations. The following guide will help first-time or beginner users to easily navigate Google docs, and explore all of the noteworthy potential that this source has to offer. With this guide to Google Docs, new users are going to get a great understanding of how to use this free service, and hopefully continue to navigate it easily in the future.
Creating a Google Account
Getting Started
While using Google Docs sounds like a lot of fun, it is best to have a Google Account first. This will allow the user to create and store their documents all on the same account. Not to mention that the Google Account will give you access to other great tools like a Gmail Account, Google Drive, and many other fun and creative resources.
To create a Google Account:
1. Visit https://www.google.com/?hl=en-US
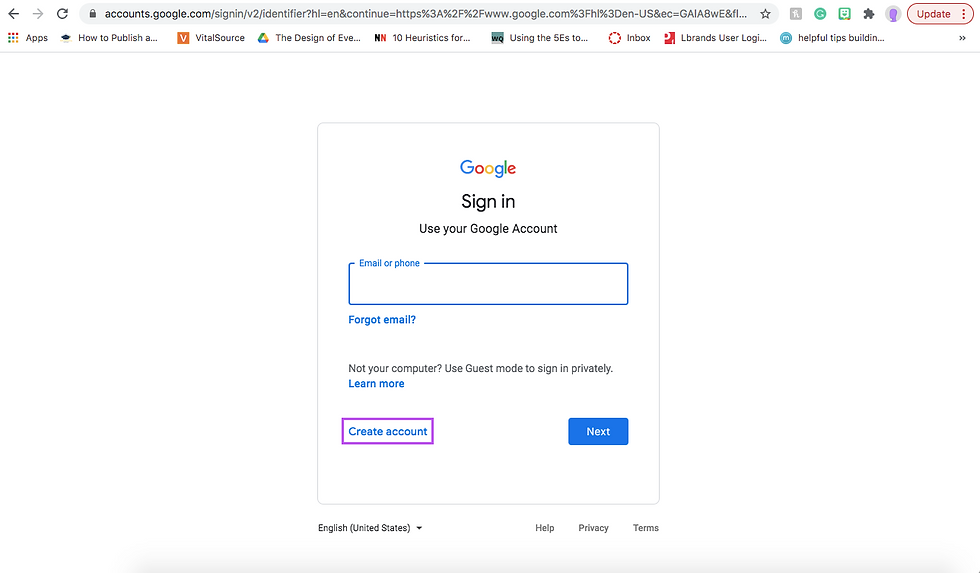
2. Click the blue “Sign In” badge in the top right corner.
3. Create a Google Account.
Setting Up
Setting up a Google Account is super easy. It only takes a couple of simple steps and then the user is right on their way to using all of the great tools that Google has to offer.
1. Click the “Sign In” badge in the top right-hand corner of the screen.

2. Click on "Create Account."
3. Fill out the information. First name, Last name, create an email and create a password. Once finished, click on the “Next” badge.

4. Fill out the information that is listed. It is not necessary to input a number or backup email, but it is strongly recommended.

5. Complete the Privacy Agreement. Then, hit the “I Agree” badge at the bottom of the page.


Once finished here, the user can access the tools that Google has to offer.
Accessing Google Docs
Easy Access
Google Docs is easy to access once the user has a Google Account created.
1. Go to https://www.google.com
2. Once signed into Google, click on the set of dots in the top right corner.

3. This will be displayed.

4. Scroll down until "Docs" is displayed in the list. When in view, click on the badge.

5. It will then take the user here.

This is Google Docs. It is where the user is welcome to store, create, and manage other documents that they may be a part of with friends or colleagues.
Creating a Document
Choosing a Template
When creating a document, it may be difficult to choose what kind of Template the user may want to use. There are various Template options in the “Template Gallery.” These templates range from Resume starters, to Lesson Plans, to simple Blank documents.
Tutorial
1. For this tutorial, the Blank document will work the best.

2. This will provide a blank canvas for helpful tips, and allow new users to better understand different aspects of Google Docs as a whole. Once the user has clicked on the Blank template, it will bring them here.

And now, they have created their first Google Doc.
Navigating Google Docs
Tabs
At the top of the Google Doc, the user can find different tabs. They will look like this.

Being able to navigate from one tab to another tab is incredibly important. This will enable the user to better use and create documents.
File
To start, the File tab has various uses. They are displayed below.

If the user wanted to create a new Google Doc, open an old one, or download the Google Doc as a Word Document, PDF, or a few other choices, they would be able to do it from this tab. Similarly, they would be able to choose to make the document available for offline changes that would later sync when the document was brought online. This is also where the user can choose the language that is recognized within the document, allow the document to be published to the web, and printed as well. Other options on this tab would be page set up sharing which will be touched on later.
Edit
Moving on, the options for Edit are displayed below.

When editing the document, the user can go to this tab and undo or redo an action they have done if they decide against it. This is also where the user can go to paste text or images into the document, and the user can also choose if they want it to be pasted with or without formatting. If the user wishes to select all of the document at the same time, they can go to the Edit tab and do that. Finally, if the user wants to search for certain words and phrases but wishes to replace them with something else, they can do that here as well.
View
The options for View are listed below.

This is where the user would go if they want to change how they are viewing the document. If Print Layout is selected, it will show the document the exact way that it would look if it were printed on a piece of paper. Mode discusses whether the user is editing the document, creating comments, or simply viewing it without the option to change anything. The next couple of options are displayed for margin purposes, the outline of the google doc if there are headings, an equation toolbar in case the user is adding math equations to the document, and there is an option to see where the document would or would not break up. The last option in View would be the option to view the document fully without any tabs, bars, or document title in the way.
Insert
The choices for Insert are displayed below.

There are a lot of options in this tab. To start, the user can insert a picture from the internet, their personal device, drive, photos, URL, or even the camera on their device. The user can add a table, as well as a drawing. With the chart option, the user can choose from various charts and do their own statistics. Another option would be a horizontal line to break the page up. A footnote can also be inserted at the bottom of a page from this tab. Moving on, if the user needs to add a special character they can do that here, as well as build equations. Headers and footers (which will be talked about later) are easy to add from this section, along with page numbers (which will also be touched on later) and page breaks. This is also a section to add a link to the document, bookmark, and create a table of contents here as well.
Format
This section has some similarities to the Insert section, but there are also some differences. They are listed below.

In the Format section, the user can choose to do a lot with the document, starting with text (which will be discussed later). The user can also change the style of paragraphs or change the way something is aligned and if it is indented. Line spacing is also seen here, as well as columns, and bullets, and numbering (which will be discussed later as well). As spoken about previously in Insert, there are headers, footers, and page numbers. Spoken about earlier as well is page orientation which can also be viewed in the File tab. This is also where the user would come if they had to edit the format of a table, image, or borders and lines. However, if they wish to delete that, they can clear the formatting from here as well.
Tools
The items that can be found in Tools are listed below.

If the user wants to check their spelling and grammar, they can do it from this tab. They can also check their word count, if there are any edits to be made, compare documents, view citations, explore (create smart images and things like that), link certain objects, and even open the dictionary from this tab. Similarly, the document can be translated from here and there is an option to type using the user’s voice. The script editor is basically where the user can write a code that can be activated within the document. There are also preferences and accessibility settings within this tab.
Add-Ons
The choices for Add-Ons are listed below.

In this tab, it will allow the user to see what add-ons are being used. Similarly, the user has the opportunity to print envelopes for the document they are creating if that add-on is already installed. There is also an option to get more add-ons or to see if add-ons that the user owns are added to the document.
Help
The options for Help are listed below.

This section is probably one of the best tools that Google Docs has to offer. If the user forgets how to add a page number, or a footer, or a special kind of indent, they can simply search for it and it will pop up with an answer below. However, there are also other options in this tab. There is more in-depth help, training, as well as available updates. Similarly, the user has the opportunity to help improve Google Docs, report any type of copyright, view the privacy policy and terms of service here. They can also create keyboard shortcuts in this tab as well.
Editing Google Docs
There are a lot of different elements that go into creating a Google Doc. The most frequently used options will be displayed in this section and will allow new and beginner users to easily navigate and edit a Google Doc.
Editing Text
There are various options for editing text. The user can change the font, give certain words color, bold, italicize, and underline words as well. While these are some options for editing text, there are even more options than that. However, for this tutorial, it will stick to the basic need-to-know editing.
1. To start, the image below is a set of text that will be nicely edited by the end of this tutorial. In this section of the text, the user will want to Bold the text that says “Chocolate Chip Cookie Recipe.”They can do this by highlighting the text and holding “command+B” or they can highlight the text and click on the B next to the plus sign.[1]

2. Once the set of text is highlighted, it should look like this.

3. Next, Bold the text that reads, “Prep Time:,” “Cook Time:,” Cool Time:,” and “Total Time:.”

4. It should look like this below.

5. Since the “Chocolate Chip Cookie Recipe” is the title, the user should know how to make the text bigger and change the color. Start by changing the font size from 12 to 18. The user can do this by highlighting the text that says “Chocolate Chip Cookie Recipe” and either changing the number manually in the text box or hitting the plus sign twice.

6. The text should look like this now.

7. Next, the user should know how to change the color of the text. They can do this by highlighting the text that says “Chocolate Chip Cookie Recipe” and clicking on the A with a line under it as displayed below.

8. It will then display a range of colors to choose from. The user can choose any color they would like, however, if others will be reading this document, it is best to choose a dark color because the background is white.

9. Once the user has chosen a color, the text should look like this.

10. Next, the user should know how to change the font. This can be done by highlighting a chunk of text and selecting the drop-down menu as seen below. The user can choose their desired font, however, Times New Roman and Calibri are usually the most frequently used fonts.

These are the main editing tips that any new or beginner user would need to accomplish editing on Google Docs. With these tools, any user is sure to create a great-looking document.
[1] If a user wishes to italicize, they can highlight the text and click on the slanted I that is next to the B or they can highlight the text and hold “command+I.” Similarly, if they choose to underline, they can highlight the text and click on the U with an underline that is next to the slanted I, or they can highlight the text and hold “command+U.”
Indentation, Alignment Styles, and Spacing
While the text in this document is beginning to have some taste, it is important to also have spacing, alignment, and indentations sometimes.
1. Start by changing the alignment of the text that says “Chocolate Chip Cookie Recipe.” This can be done by highlighting the text and hitting the dropdown menu toward the far right.

2. The user will then have these options displayed. Since the goal is to align the text to the middle, the user will want to choose the second option.

3. It will look like this.

4. Next, there needs to be spacing between the different sets of text. This can be done by putting the mouse at the beginning of the word “All” and pressing the “Enter” key. The text should then look like this.

5. Follow this by putting the mouse at the beginning of the word “Prep.” Following this, the user should press the “Enter” key. The document should then look like this.

6. While spacing and alignment have been touched on, the next step is to understand indentations. This can be done a couple of ways, but the quickest way is to place the mouse at the beginning of the paragraph that the user wishes to indent. For example, place the mouse in front of the word “Prep” once more. Once the mouse is in position, press the “Tab” key on the keyboard. Do this for each line until the document looks like this.

Now that the user should be able to understand indentation, alignment styles, and spacing, they should be able to accomplish what has been presented in the past couple of steps flawlessly. It will enable the user to create better documents that will stand out from the rest.
Bullet Points
Moving on, bullet points are something that will separate a subpar document up to a much more concise document. With bullet points, the user will have the ability to separate chunks of text and make their ideas clearer.
1. To start, this list of ingredients needs to be put into bullet points. There are a couple of ways to do this. The one that will be shown here is by highlighting the text below, click on the three dots toward the top right, and then choose bullet points from the list as shown below.

2. It should then look like this.

3. Next, the user will need to know how to add number bullet points in case they are doing a step-by-step guide. This is very similar to Step 1 as seen above, except instead of hitting the second set of bullet points, the user will choose the numbered bullet points. It should look something like this.

This set of steps is very simple and easy to follow. The user will be able to set their documents apart with spacing, numbering, and bullet points as seen in the steps listened above.
Inserting Images
Inserting images is a great way to set a document apart as well. This will allow the user to connect with their audience more, and it will also be beneficial if they are creating a tutorial of some sort. Understanding how to insert a picture of some sort will truly allow the user to create an outstanding and noteworthy document.
1. To insert a photo, highlight the text where the user wishes to insert a photo, or simply click on the space that the picture should be. Then, click on the Insert tab at the top.

2. Next, slide the mouse over “Image” when the drop-down menu shows up. Then, choose where to get the picture from. For this tutorial, it will be “Upload from computer."

3. After this, a window will open. This is where the user can choose what image they want to insert. Once they have selected the image they wish to upload, the user must hit “Open."

4. Usually, the user will be left with an image that takes up way too much space like in the picture below.

5. To adjust the size of the image, click on it. It should then look like this.

6. The user can then adjust the alignment and use the little points to change the size of the image. Once the resizing and alignment have been completed, it should look more like this.

Overall, inserting and adjusting pictures in Google Docs is not a difficult task, it sometimes is simply time-consuming. A little too big or too small of an adjustment can upset the entire document, but it is easy to go back to the way things were once the user gets the hang of it.
Headers, Footers, and Page Numbers
These three things are probably some of the most important things to understand in Google Docs. They can truly separate a document from another, and these items are sometimes even necessary for a person to succeed.
1. To add a header to the document, the user can either double click the empty space at the very top of a document page, or they can go to the Insert tab and select it from there. Once chosen, the document should look like this.

2. Next, the user has ample opportunities to do various things. For this one, simply write, “Chocolate Chip Cookie Recipe.” Then, change the text so that the font is Times New Roman and the size is 12. The header should look something like this once finished.

3. Now, since this recipe has a header and a title with the same exact set of words, it looks a little silly. When the header is being edited, there is an option to choose “Different first page” compared to the rest of the document.

4. Choose this option so that “Chocolate Chip Cookie Recipe” is only in the header starting on the second page instead of starting on the title page. It should look like this.


5. In order to add a Footer, it is very similar to adding a Header. The user can either double click the empty space at the very bottom of a document page, or they can go to the Insert tab and select it from there. Once chosen, the document should look like this.

6. This section also has the option to look different from the rest of the document in comparison to the rest of the pages. Normally, the only time that the footers are used are for footnotes considering most types of formats call for page numbers in the top corners of the pages.
7. Moving on, page numbers are the last important item to cover. To add page numbers, go to the Insert tab and scroll over the Page Numbers option. It will then display this.

8. As seen in the image above, choose the first option. This will display a number starting on the first page of the document. Unfortunately, it will take some editing to make the rest of the document match, but it will insert like this on the first page.

9. To edit the page number, double click on the header. Then, change the font to Times New Roman, change the size to 12, and align the number to the right. It should look like this.

10. The second-page header is not aligned properly. The user should take some time to adjust the header so that it is in alignment. It may take a few moments but it should ultimately look like this.

While adding headers and footers are not insanely difficult, they do take some adjusting and editing to get perfectly right. This is what they should look like in the end though, and adding them to any document will allow others to keep track of what is going on at all times.
Sharing With Others
Share
Whether it is a group project, a big work document, or a simple creative writing document that the user may want a friend to look at, Google Docs makes it easy to share with others. These steps will easily allow the user to share the document they are working on with others.
1. First, start by naming the document.

2. Sometimes, a name will auto-populate, but if this name does not fit what the user would like, they can highlight the text and change it themselves. Following this, click on the badge that says “Share” in the top right corner.

3. It will then pull up the window below.

4. There are a couple of different options that can take place here, but this tutorial will show how to change the link so that anyone can have access to the document and edit it. Start by clicking on “Change to anyone with the link."

5. Link sharing is the easiest way to send to friends quickly instead of adding their emails into the bar at the top. However, depending on what the user wishes for their friends to do to the document, they will have to edit the options.

6. For example, this picture shows that anyone who received the link would be a viewer, but if the user were to click on "Viewer" a few things become displayed.

7. If the user wishes for their friends to simply read their document, sharing the link and keeping it as “Viewer,” works great. If the user wants their friends or coworkers to leave notes but not edit the text, the link can be changed to “Commenter” instead. And if it is supposed to be a collaborative document, the user can change the link to “Editor” and it will allow anyone with the link to edit the document. Once the decision has been made, the user can click “Copy link” and then send it to any of their friends or coworkers and get to collaborating quickly.

8. When the link has been copied, the user can click the “Done” badge, and then they are all set to send the link around.

Now that the user understands how to share a document with others, they can collaborate and work on documents with others from practically anywhere. This will also allow them to better work in groups as well.
Credits
A special thanks goes to Google, and Google Docs. These two software packages are in no way my own creation; however, they have provided me with a source to create this tutorial. Without either of those programs, it would be impossible to create this tutorial.
· Google: https://www.google.com/?hl=en-US
· Google Docs: https://docs.google.com
To download a PDF version of this, click here.
Comments